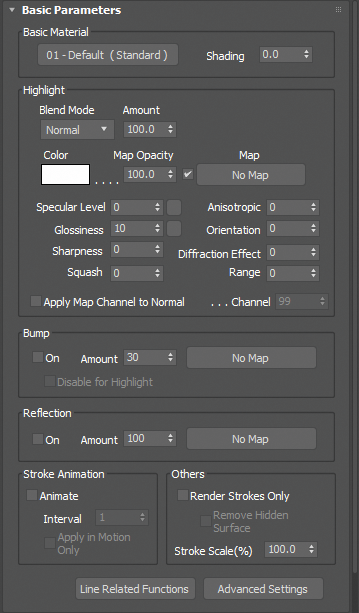
Pencil+ 4 Material
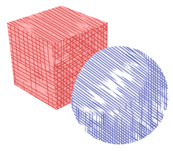
Pencil+ 4 Material allows you to create materials that have a hand-drawn feel. With Pencil+ 4 Material, you can output to file only the necessary material data by combining output material elements and material IDs.
Please have a look at [Nitrous Shader] to display Pencil+ 4 Materials on the 3ds Max viewport.

Basic Parameters
Define settings that control the basic feel of the material, such as [Highlight], [Bump], [Reflection], etc. here.
Basic Material
The Pencil+ 4 Material shading computation is defined here.
Basic Material
Select the material to be processed by Pencil+ 4 Material.
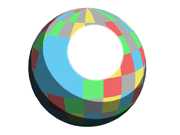
Usually, [Standard Materials] are used, but [Multi-/Sub-Objects] can also be used. When using [Multi-/Sub-Objects], the Pencil+ 4 Materials's Gradation can be applied to all the materials added to the [Multi-/Sub-Objects], making it possible to edit large quantities of materials efficiently.
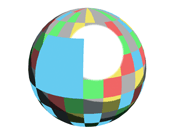
However, when Pencil+ 4 Materials are included in the [Multi-/Sub-Objects], the settings of the included Pencil+ 4 Materials take precedence.
 |
 |
|---|---|
| Using a [Multi-/Sub-Objects] as the Basic Material | A Pencil+ 4 Material is included in the [Multi-/Sub-Objects] (The setting of Highlight to Off in the light blue material takes precedence) |
Shading
Adjust the shading intensity of the [Basic Material]. This parameter is used as shading for the base of the Gradation when the [Color] checkbox of a [Zone color] group is disabled, when the [Blend Mode] is set to a value other than [Normal] or when the blend [Amount] is reduced.
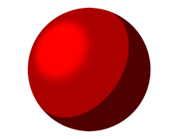
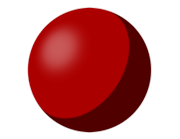
Highlight
Handles the specular reflection settings. Use these settings to create highlights such as those in hand-drawn art.
Blend Mode
Select how to blend the specular reflection light.
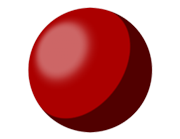
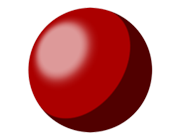
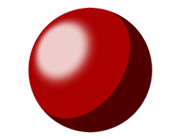
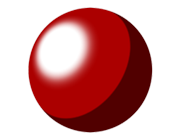
Amount
Adjusts the intensity of the blending. A low value will produce transparent highlights.
 |
 |
 |
 |
 |
 |
|---|---|---|---|---|---|
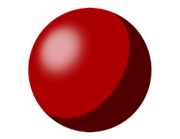
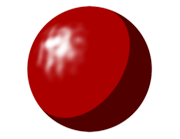
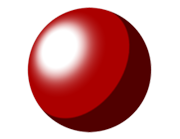
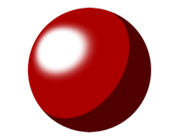
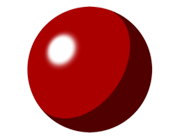
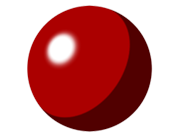
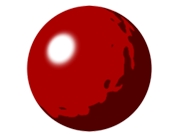
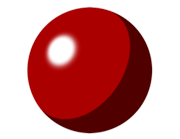
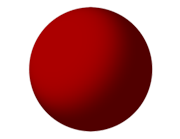
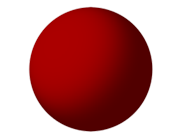
| Amount : 0 Specular Level : 100 Glossiness : 0 |
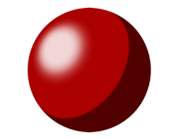
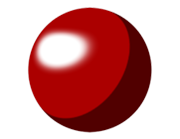
Amount : 20 Specular Level : 100 Glossiness : 0 |
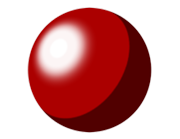
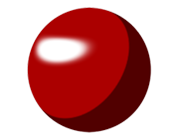
Amount : 40 Specular Level : 100 Glossiness : 0 |
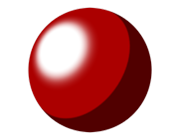
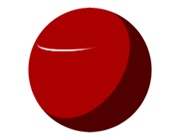
Amount : 60 Specular Level : 100 Glossiness : 0 |
Amount : 80 Specular Level : 100 Glossiness : 0 |
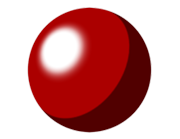
Amount : 100 Specular Level : 100 Glossiness : 0 |
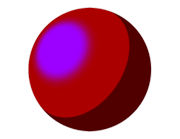
Color
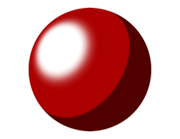
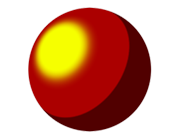
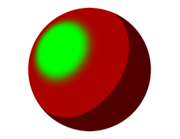
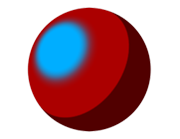
Select the color of the specular reflection light.
 |
 |
 |
 |
 |
 |
|---|---|---|---|---|---|
| Using white | Using yellow | Using green | Using blue | Using purple | Using red |
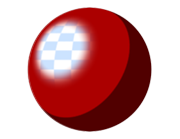
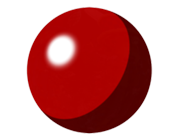
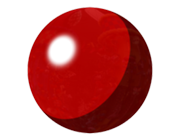
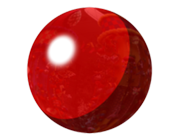
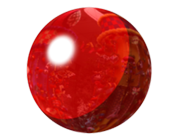
Map Opacity
Adjust the opacity of the map. A low value will make the map transparent.
Map
Select a map for the specular reflection.
 |
 |
 |
 |
 |
 |
|---|---|---|---|---|---|
| Map Opacity : 0 (Using a checkered map) |
Map Opacity : 20 | Map Opacity : 40 | Map Opacity : 60 | Map Opacity : 80 | Map Opacity : 100 |
Specular Level
Adjust the intensity of the specular reflection light.
 |
 |
 |
 |
 |
 |
|---|---|---|---|---|---|
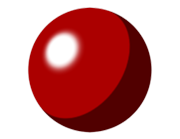
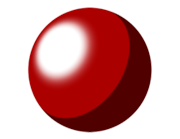
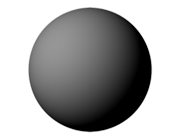
| Specular Level : 0 Glossiness : 0 |
Specular Level : 20 Glossiness : 0 |
Specular Level : 40 Glossiness : 0 |
Specular Level : 60 Glossiness : 0 |
Specular Level : 80 Glossiness : 0 |
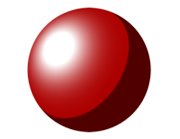
Specular Level : 100 Glossiness : 0 |
Specular Level Map
Selects a map for the intensity of the specular reflection light.
 |
 |
|---|---|
| Specular Level : 100 Glossiness : 0 (No map) |
Using a noise map for Specular Level Glossiness : 0 |
Glossiness
Adjust the intensity of the glossiness spread.
 |
 |
 |
 |
 |
 |
|---|---|---|---|---|---|
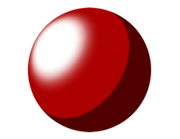
| Specular Level : 100 Glossiness : 0 |
Specular Level : 100 Glossiness : 20 |
Specular Level : 100 Glossiness : 40 |
Specular Level : 100 Glossiness : 60 |
Specular Level : 100 Glossiness : 80 |
Specular Level : 100 Glossiness : 100 |
Glossiness Map
Select a map for the glossiness.
|
 |
|---|---|
| Specular Level : 100 Glossiness : 0 (No map) |
Specular Level : 100 (Using a noise map for the Glossiness) |
Sharpness
Adjust the sharpness of the glossiness spread.
 |
 |
 |
 |
 |
 |
|---|---|---|---|---|---|
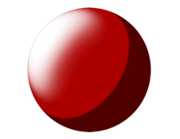
| Specular Level : 100 Glossiness : 0 Sharpness : 0 |
Specular Level : 100 Glossiness : 0 Sharpness : 20 |
Specular Level : 100 Glossiness : 0 Sharpness : 40 |
Specular Level : 100 Glossiness : 0 Sharpness : 60 |
Specular Level : 100 Glossiness : 0 Sharpness : 80 |
Specular Level : 100 Glossiness : 0 Sharpness : 100 |
Squash
Adjust how strongly the shape of the object influences the specular reflection.
 |
 |
 |
 |
 |
 |
|---|---|---|---|---|---|
| Specular Level : 100 Glossiness : 0 Squash : 0 |
Specular Level : 100 Glossiness : 0 Squash : 20 |
Specular Level : 100 Glossiness : 0 Squash : 40 |
Specular Level : 100 Glossiness : 0 Squash : 60 |
Specular Level : 100 Glossiness : 0 Squash : 80 |
Specular Level : 100 Glossiness : 0 Squash : 100 |
Anisotropic
Set the thickness of the polish, influencing the size of the specular reflection.
 |
 |
 |
 |
 |
 |
|---|---|---|---|---|---|
| Specular Level : 100 Glossiness : 0 Anisotropic : 0 |
Specular Level : 100 Glossiness : 0 Anisotropic : 20 |
Specular Level : 100 Glossiness : 0 Anisotropic : 40 |
Specular Level : 100 Glossiness : 0 Anisotropic : 60 |
Specular Level : 100 Glossiness : 0 Anisotropic : 80 |
Specular Level : 100 Glossiness : 0 Anisotropic : 100 |
Orientation
Specify the direction of the anisotropic reflection.
 |
 |
 |
 |
 |
 |
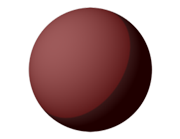
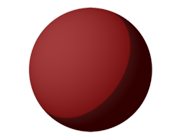
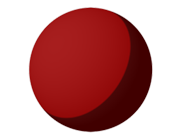
Specular Level : 100 Glossiness : 0 Anisotropic : 90 Orientation : 0 |
Specular Level : 100 Glossiness : 0 Anisotropic : 90 Orientation : 30 |
Specular Level : 100 Glossiness : 0 Anisotropic : 90 Orientation : 60 |
Specular Level : 100 Glossiness : 0 Anisotropic : 90 Orientation : 90 |
Specular Level : 100 Glossiness : 0 Anisotropic : 90 Orientation : 120 |
Specular Level : 100 Glossiness : 0 Anisotropic : 90 Orientation : 150 |
|---|
Diffraction Effect
Adjust how much highlights wrap around the shape of the geometry.
 |
 |
 |
 |
 |
 |
Specular Level : 100 Glossiness : 0 Diffraction Effect : 0 |
Specular Level : 100 Glossiness : 0 Diffraction Effect : 20 |
Specular Level : 100 Glossiness : 0 Diffraction Effect : 40 |
Specular Level : 100 Glossiness : 0 Diffraction Effect : 60 |
Specular Level : 100 Glossiness : 0 Diffraction Effect : 80 |
Specular Level : 100 Glossiness : 0 Diffraction Effect : 100 |
|---|
Range
Adjust the range of the diffraction effect.
 |
 |
 |
 |
 |
 |
|---|---|---|---|---|---|
| Specular Level : 100 Glossiness : 0 Diffraction Effect : 0 Range : -30 |
Specular Level : 100 Glossiness : 0 Diffraction Effect : 20 Range : -20 |
Specular Level : 100 Glossiness : 0 Diffraction Effect : 40 Range : -10 |
Specular Level : 100 Glossiness : 0 Diffraction Effect : 60 Range : 0 |
Specular Level : 100 Glossiness : 0 Diffraction Effect : 80 Range : 10 |
Specular Level : 100 Glossiness : 0 Diffraction Effect : 100 Range : 20 |
Apply Map Channel to Normal
Use a map channel's normals information to draw the highlights. Efficient when Pencil+ 4 Normal Copy modifier's Map Channel is On. Use along with the Map Channel Number.
Bump
Use an image as a bump map to create a pseudo-roughness effect.
On
Enable / disable the bump effect.
Amount
Adjust the intensity of the bump effect.
Map
Select a bump map.
 |
 |
 |
 |
 |
 |
|---|---|---|---|---|---|
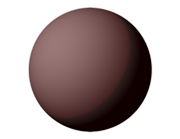
| Bump Amount : 0 Disable for Highlight : Off (Using a noise map for the bump map) |
Bump Amount : 20 Disable for Highlight : Off |
Bump Amount : 40 Disable for Highlight : Off |
Bump Amount : 60 Disable for Highlight : Off |
Bump Amount : 80 Disable for Highlight : Off |
Bump Amount : 100 Disable for Highlight : Off |
Disable for Highlight
Enable / disable the effect of the bump map on the highlight.
 |
 |
 |
 |
 |
 |
|---|---|---|---|---|---|
| Bump Amount : 0 Disable for Highlight : On (Using a noise map for the bump map) |
Bump Amount : 20 Disable for Highlight : On |
Bump Amount : 40 Disable for Highlight : On |
Bump Amount : 60 Disable for Highlight : On |
Bump Amount : 80 Disable for Highlight : On |
Bump Amount : 100 Disable for Highlight : On |
Reflection
Use Reflection to create reflections of the surrounding environment, like for metallic surfaces.
On
Enable / disable the reflection effect.
Amount
Adjust the intensity of the reflection effect.
Map
Select a reflection map. Use [Bitmap] to create pseudo-reflections using environment mapping. Use [Raytrace] to compute realistic reflections.
 |
 |
 |
 |
 |
 |
|---|---|---|---|---|---|
| Amount : 0 (Using a Bitmap for the reflection) |
Amount : 20 | Amount : 40 | Amount : 60 | Amount : 80 | Amount : 100 |
Stroke Animation
Animate stroke maps automatically.
Animate
Activate / deactivate the stroke animation effect. When activated, animates strokes by changing the random seed of the [Stroke Map.]
Interval
Specify the interval between changes to the random seed. Setting [Interval] to 5 means that the lines will change every 5 frames.
 |
|---|
| Stroke animatiOn |
Apply in Motion Only
When enabled, the random seed will only be changed if the objects where the Material is applied are moved or deformed.
Warning
This function is not compatible with network rendering.
Others
Special settings related to Stroke Maps.
Render Strokes Only
Only the stroke map defined in its [Zone] is rendered.
 |
 |
|---|---|
| Render Stroke Only : Off | Render Stroke Only : On |
Remove Hidden Surface
Hidden surfaces of objects are not drawn.
|
 |
|---|---|
| Render Stroke Only : On Remove Hidden Surface : Off |
Render Stroke Only : On Remove Hidden Surface : On |
Stroke Scale
Alter the [Stroke Sizes] in the Material.
Advanced Settings
Advanced settings of Pencil+ 4 Material.
Line Related Functions
Access the section related to Pencil+ 4 Line. Refer to [Line Related Functions] for details.
Advanced Settings
Access the extended functions of [Pencil+ 4 Material]. Refer to [Advanced Settings] for details.
Gradation
Define the Gradation settings of the Material.
Gradation Presets
Handles preset functionality.
Gradation Presets
Load previously saved parameter settings. The values for [Positions], [Zone ID] and [Zone Color] are saved.
Presets are saved to the following file:
Windows 7 and up:
C:\Users\Public\Documents\PSOFT\Pencil+ 4 for 3ds Max\Presets\pencil+4_preset_gradation.txt
Add
Save the current settings to Presets. Click [Add] after typing the presets name in the text entry field.
Warning
The Map settings are not saved to Presets.
Delete
Delete the current Presets. Click [Delete] after selecting the Presets you wish to delete in the drop-down list.
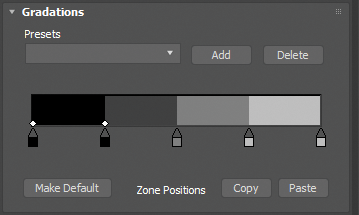
Gradation Bar
Edit the material gradation by adjusting the Zone positions and colors. The gradation bar is an interface to allow you to edit the parameters in the Zone section visually. Edits on the gradation bar are reflected in the values of [Color], [Min] and [Max] Positions in the Zone section.
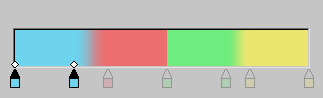
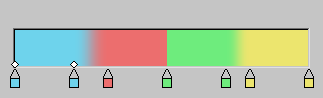
The Zone positions and colors are shown with color flag icons made from a square and a triangle. Zones are represented by sets of 2 color flags showing the start and end positions. Zones that are completely squashed on the left or right edge of the gradation bar will not be rendered.
Editing the Color
Double-click a color flag or the gradation bar to open a color selector which can be used to set the color.
Zone Position Selection
Click a color flag to select it. The currently selected color flags are displayed with white diamond icons.
Use [Shift + click] to add color flags to the selection.
Use [Ctrl + click] to toggle the selection.
Drag the mouse outside the gradation bar to select everything in the selection rectangle.
Adding Zones
Add a zone by double-clicking a position under the gradation bar, between 2 color flags. You may create up to 200 zones.
Deleting Zones
Drag a color flag outside the gradation area to delete it. When using the Compact Material Editor, you can also use the [Delete] key to delete the currently selected zones.
Editing Zone Positions
Drag color flags to edit the zone positions.
When multiple color flags are selected, a [Selection Range] is displayed under the flags. Drag the white icons at the edges of the [Selection Range] to expand or contract multiple zones.
Duplicating Zones
Duplicate zones with [Ctrl + Alt + Drag].
 |
| Duplicating zones |
Switching Zone Positions
Switch zone positions with [Ctrl + Drag].
 |
| Switching zone positions |
Fix the positions of adjacent zones and move
Move while fixing the positions of the unselected adjacent zones with [Shift + Drag].
 |
| Moving with unselected zone positions fixed |
Move with the selected zone positions fixed
Move while fixing the positions of the selected zones as well as those of the adjacent unselected zones with [Shit + Alt + Drag].
 |
| Moving with selected zone positions fixed |
Make Default, Copy and Paste
Set gradation defaults and copy-paste the gradation settings here.
Make Default
Make the current settings the initial default values. The default values are used when creating new materials.
The settings file is saved in the following location. To restore factory default values, delete the file "pencil+4_gradation.ini" and restart 3ds Max.
Windows 7 and up:
C:\Users\Public\Documents\PSOFT\Pencil+ 4 for 3ds Max\Configs\pencil+4_gradation.ini
Copy / Paste
Copy / Paste the Zone positions. Use this to copy the position values to another material.
Zone
Edit the Zone Positions and Colors here. Zones define areas on the material where single colors are drawn. Use a small number of zones to create a flat, posterized look.
The values of [Color], [Min] and [Max] in the Zone section are linked to the gradation bar.

Zone Tabs
Use the tabs to switch the Zone being displayed.
Pencil+ 4 Material uses the tabs to display and manage multiple Zones. The values of the Zones can be adjusted separately.
Positions
Set the start and end positions of the Zones. Pencil+ 4 Material uses these positions to define the areas where colors are drawn.
Min
Set the Zone start position.
Max
Set the Zone end position.
 |
 |
 |
 |
 |
 |
|---|---|---|---|---|---|
| Zone 1 Min : 0 Zone 1 Max : 50 Zone 2 Min : 50 Zone 2 Max : 100 |
Zone 1 Min : 0 Zone 1 Max : 40 Zone 2 Min : 60 Zone 2 Max : 100 |
Zone 1 Min : 0 Zone 1 Max : 30 Zone 2 Min : 70 Zone 2 Max : 100 |
Zone 1 Min : 0 Zone 1 Max : 20 Zone 2 Min : 80 Zone 2 Max : 100 |
Zone 1 Min : 0 Zone 1 Max : 10 Zone 2 Min : 90 Zone 2 Max : 100 |
Zone 1 Min : 0 Zone 1 Max : 0 Zone 2 Min : 100 Zone 2 Max : 100 |
Zone ID
Assign an ID number between 1 and 8 to the zone. Zone IDs are used by [Pencil+ 4 Material Output] in [Render Elements].
Use this parameter to separately output only specific objects or zones. For example, by assigning different Zone IDs to a character and to the background, it is possible to output the character and the background to different image files.
Zone Color
Set the Zone color and transparency.
Enable Zone
Enable / disable the Zone. When disabled, the material set as the [Basic Material] is painted.
Blend
Select how to blend Zone Colors.
Amount
Adjust the intensity of the blending. Use a low value to make the Zone transparent and mix its color with the [Basic Material.]
 |
 |
 |
 |
 |
 |
|---|---|---|---|---|---|
| Blend Amount : 0 Shading : 100 |
Blend Amount : 20 Shading : 100 |
Blend Amount : 40 Shading : 100 |
Blend Amount : 60 Shading : 100 |
Blend Amount : 80 Shading : 100 |
Blend Amount : 100 Shading : 100 |
Color
Set the color used for the Zone.
 |
 |
 |
 |
 |
 |
|---|---|---|---|---|---|
| Using white | Using yellow | Using green | Using blue | Using purple | Using red |
Map Opacity
Adjust the opacity of the map applied to the Zone. A lower value makes the map more transparent.
Map
Apply a map to the Zone Color.
 |
 |
 |
 |
 |
 |
|---|---|---|---|---|---|
| Map Opacity : 0 (Using a checkered map) |
Map Opacity : 20 | Map Opacity : 40 | Map Opacity : 60 | Map Opacity : 80 | Map Opacity : 100 |
Strokes
Assign Stroke Maps to Zones.
Set Number
Specify a number of Stroke Maps to add.
Add
Add a single Stroke Map.
Delete
Open the [Delete Strokes] dialog.
Strokes List
List of the Stroke Maps assigned to the current Zone. Up to 100 maps can be added. Strokes are processed like layers, in order, starting from stroke number 1.
Copy and Paste
Copy and paste Stroke Maps.
Copy / Paste
Copy and paste the maps in the Stroke List. Use this to copy maps between Zones.
User Defined
User defined data can be stored here. Use this to manage data. These settings have no effect on rendering.
User Defined
Set your user defined data here.
Label Color
Set the label color. This setting is currently used for displaying labels in Pencil+ 4 Spreadsheet.
Comment
You can input text here.