9. Moving Licenses
We explain how to move licenses to another PC. After moving licenses to a new server PC, you will need to change the network settings of the NL Setting Tool on the client PCs.
Moving Server PC Licenses
The main steps are as follows.
- Return the licenses on the current server PC.
- Add the "Product Serial IDs" to the new server PC.
- Authorize the added licenses.
Step 1: Return the licenses on the current server PC.
-
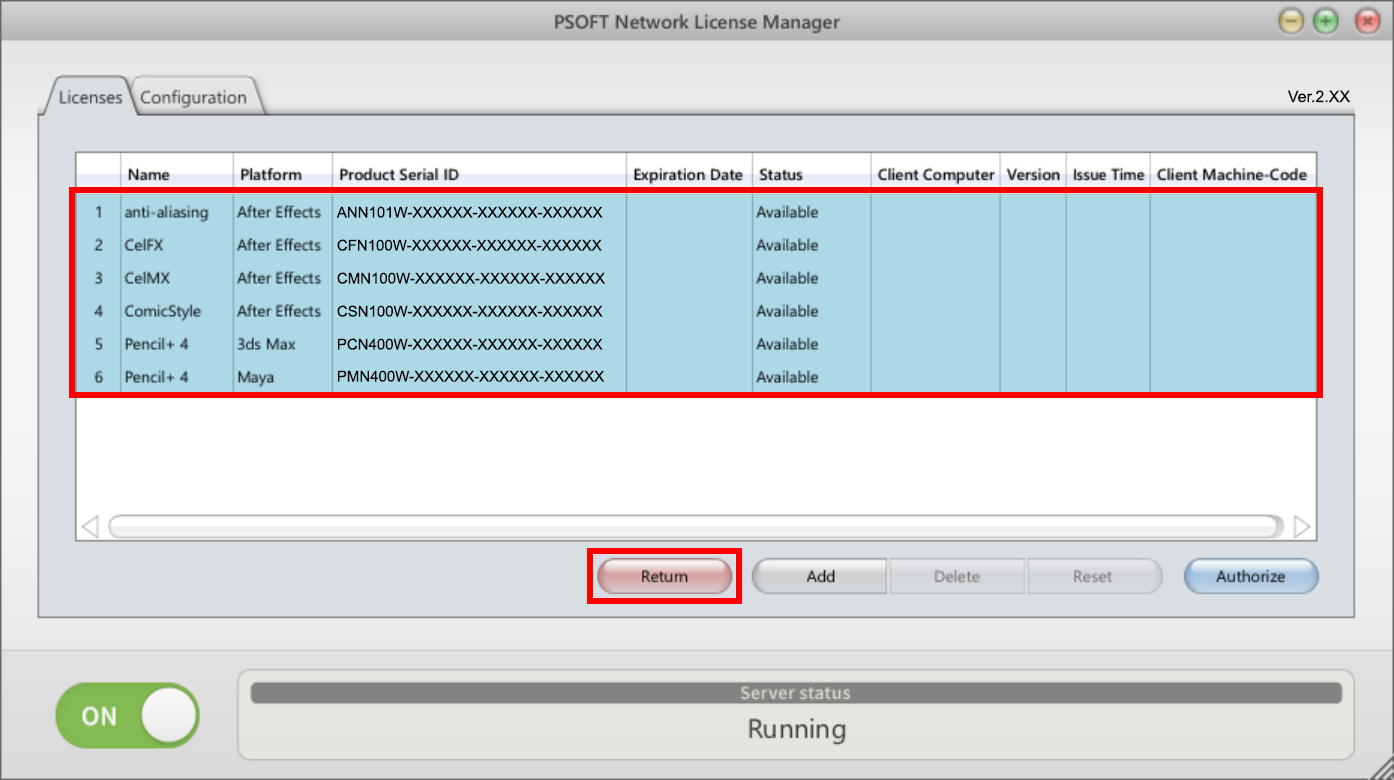
Select the licenses you wish to return (you can select multiple licenses) and click [Return].
Info
You can select and return all licenses at once by pressing Ctrl + A in the PSOFT Network License Manager list.
-
Enter your login ID and password in the tab Return online and click [OK].
A confirmation dialog is shown. If there is no problem, click [OK].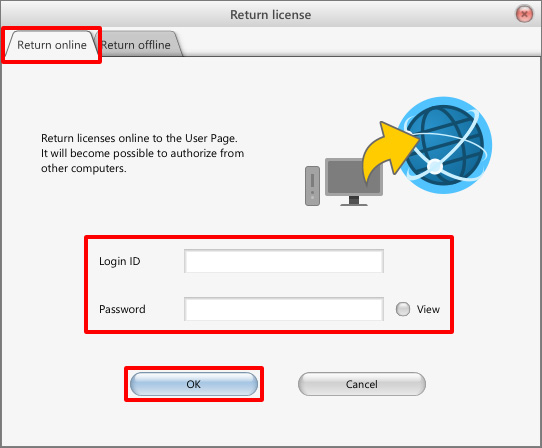
-
Confirm that the status of the licenses changed to [Un-Authorized].

Info
If the server PC cannot access the internet, please use [Returning Offline] to return the licenses.
Caution
Pencil+ 2, Liquid+, anti-aliasing for After Effects (products with a Serial ID starting with ANN100W) do not support returning licenses.
Please apply for re-authorization from the [User Page] for products that do not support license returns.
Go to the [Authorize] page and click the button [Re-authorize] to the right of the product you wish to re-authorize to open the re-authorization application form.
User Page
Step 2: Add the "Product Serial IDs" to the new server PC.
-
Login to the User Page and click [Authorize].
User Page (https://www.psoft.co.jp/user/en/)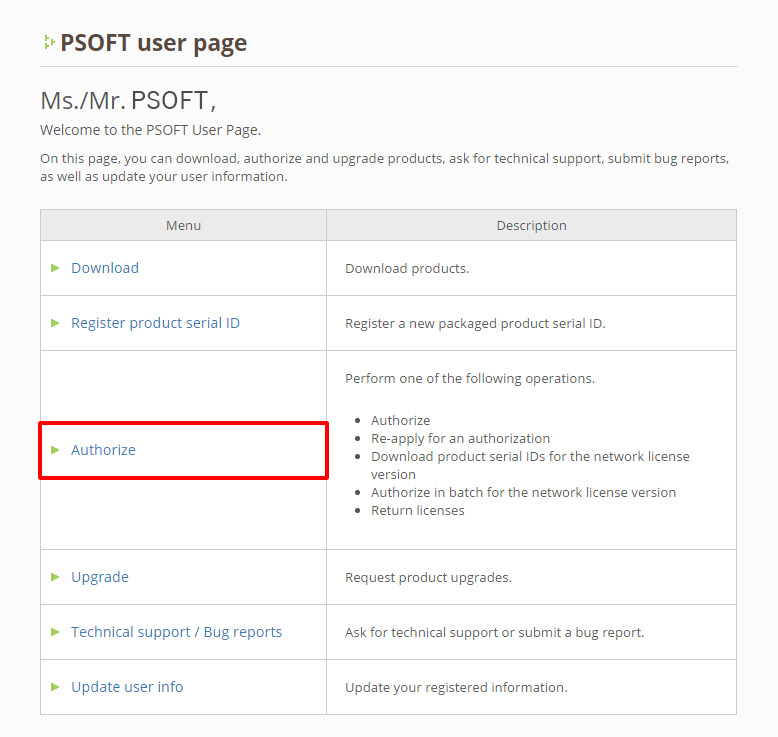
-
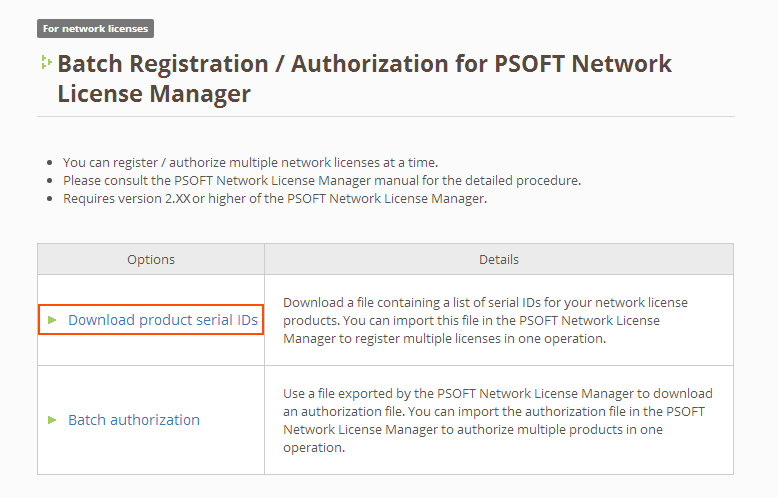
Click [Download product serial IDs].
-
Check in the boxes next to the products you wish to add to the license server and click [Download].
The next screen will start the file download.
-
Click [Add] on the licenses tab.

-
Click [Load file].
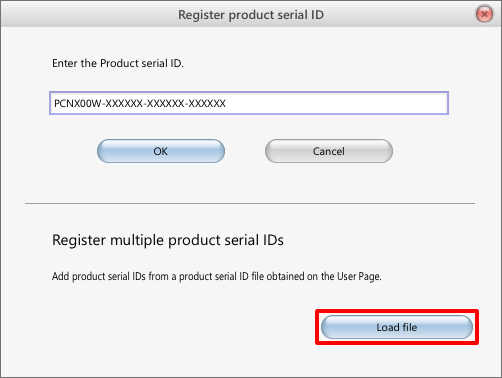
-
Select the file downloaded in Step 3 and click [Open].
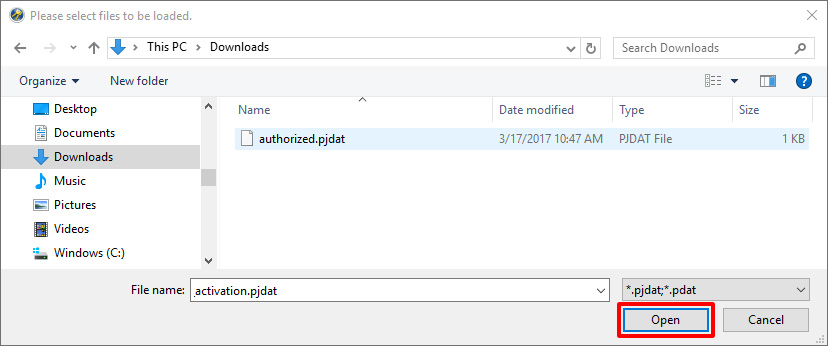
-
Confirm that the new licenses were added to the licenses overview.

Removing Licenses
If you have registered product serial IDs by mistake, you can remove them by following the following steps.
- Select the licenses you wish to remove.
- Click the [Delete] button.
*Authorized licenses cannot be removed.
Step 3: Authorize the added licenses.
-
Select the licenses you wish to authorize (you can select multiple licenses) and click [Authorize].
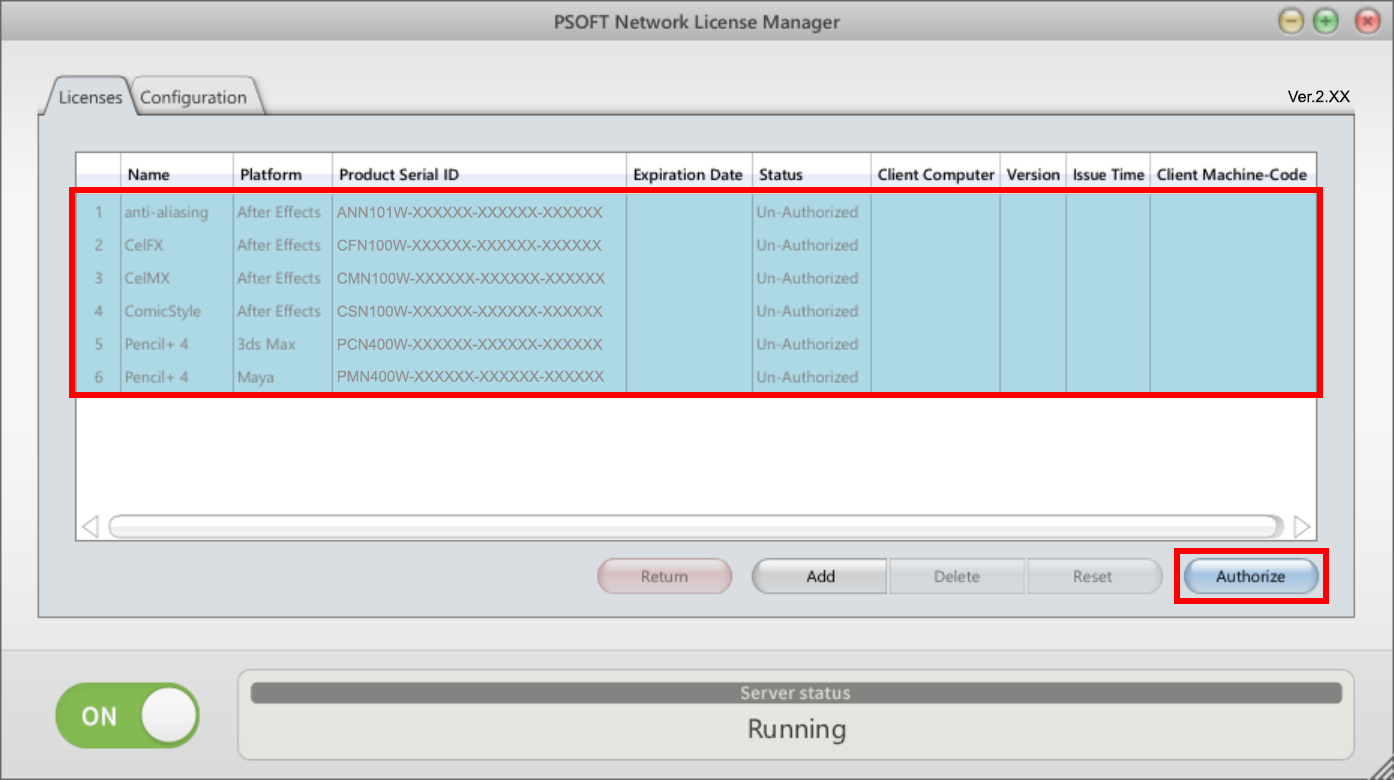
Info
You can select and authorize all licenses at once by pressing Ctrl + A in the PSOFT Network License Manager list.
-
Enter your login ID and password in the tab [Authorize online] and click [OK].
A confirmation dialog is shown. If there is no problem, click [OK].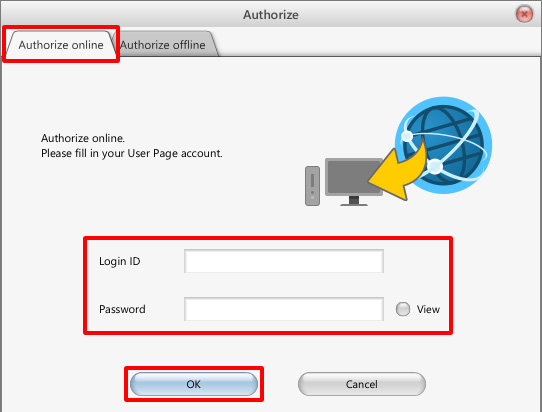
-
Check the status of the licenses. If they became [Available], the license transfer to the new server PC is completed.

Info
If the server PC cannot access the internet, please use [Offline Authentication] to authorize the licenses.
Changing the network settings on the client PCs.
Change the network settings of the NL Setting Tool on the client PCs to match the new server PC.
Info
You don't need to change the NL Setting Tool settings in the following cases:
- The names of the old and new server PCs are the same, and the name of the server PC is used for [Hostname/IP] in the NL Setting Tool on the client PCs.
- The old and new server PCs have the same IP address, and the IP address of the server is used for [Hostname/IP] in the NL Setting Tool on the client PCs.
Starting the NL Setting Tool for each product
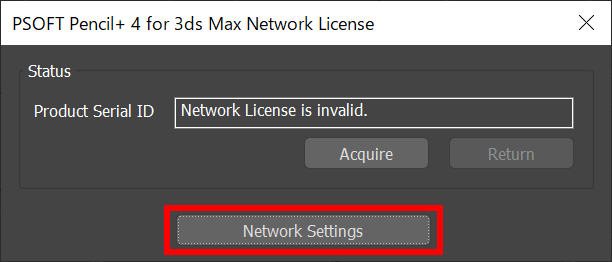
For 3ds Max and Maya
Click [Pencil+ 4] > [License] in the menu bar, click the [Network Settings] button in the Pencil+ 4 Network License dialog.
For Pencil+ 4 Render App
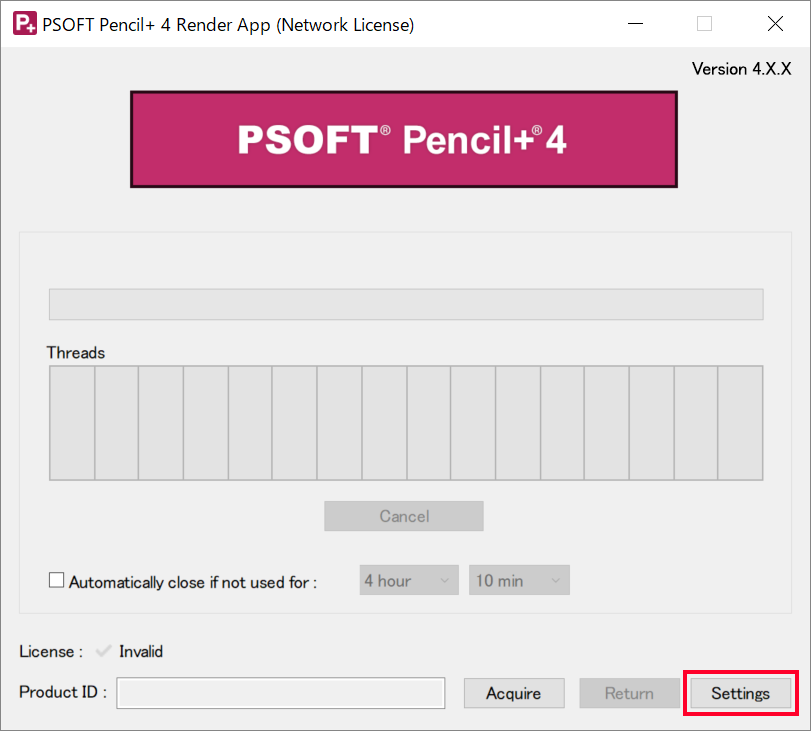
Launch the Pencil+ 4 Render App and click the [Settings] button in the dialog.
For After Effects
-
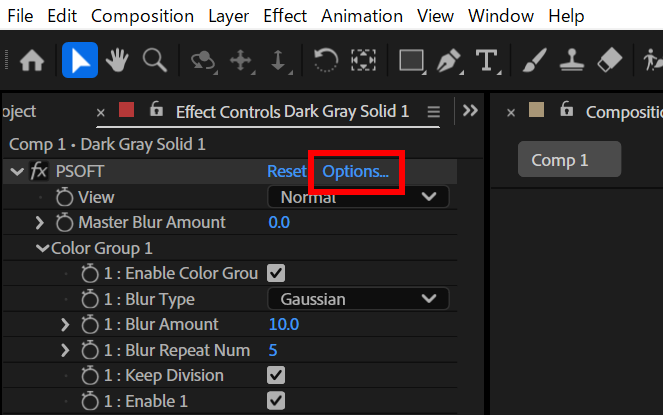
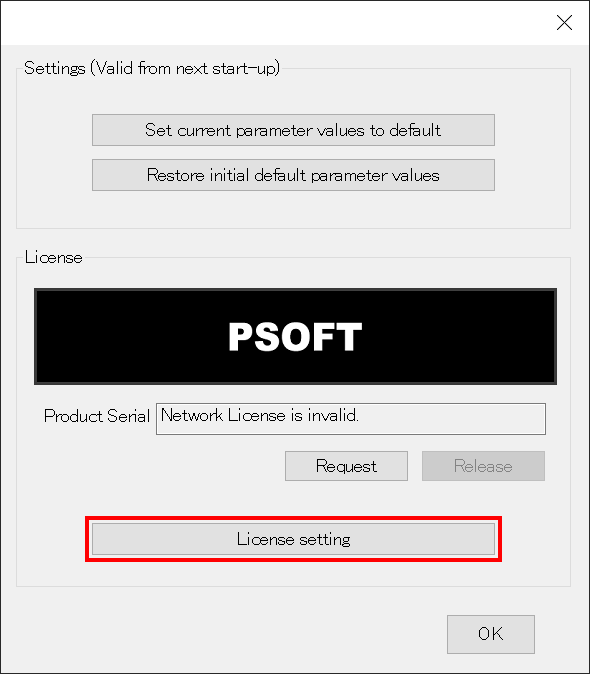
Click [Options] in the Effect Control Panel and then click [License setting] in the [Options] dialog.
-
Click the [License setting] button.
NLM Server Settings
-
Start the "NL Setting Tool" and click [Edit] to open the "License Server Settings" window.

-
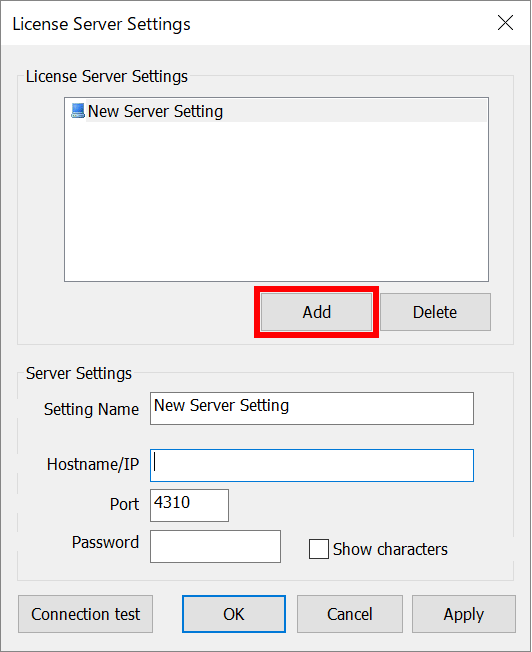
Click [Add] to add new server settings or click on an existing server entry in the list to edit it.
-
Fill in the fields for the [Setting Name], [Hostname/IP] and [Port].
If, on the NLM side, the port number is set to a value other than the default, or if a password is set, please fill in the appropriate values.Info
You can find the IP address and port number of the server on the [Configuration] tab of the PSOFT Network License Manager.
Caution
Only alphanumeric characters can be used for the password.
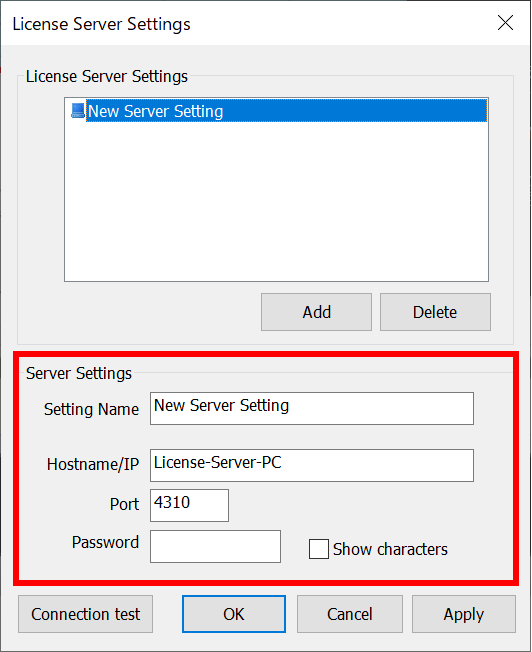
Finish editing the NLM server settings by pressing [Apply] to apply the edits or by pressing [OK] to apply and close the [License Server Settings] window.
If the client PC can successfully acquire a license, the license migration is complete.
Info
Please refer to the manual for each product to find how to acquire a license for its network license version.
Online Manuals
Downloads Page