Basics Of Line Rendering
We explain how to use Pencil+ 4 Line to draw lines over objects.
Create Objects
Create objects where the Lines will be drawn. For this we will create Monkey from Mesh. To cleanly output the Lines, we added [Subdivision Surface] from [Modifier Properties] to the object and set [Shade Smooth].

Pencil+ 4 Line Node Tree Settings
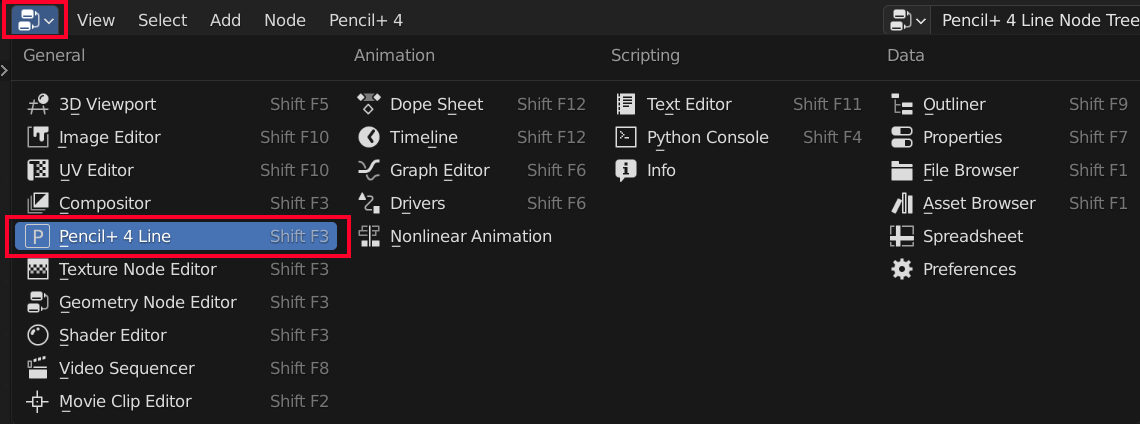
- Add a window and set the [Editor Type] to [Pencil+ 4 Line].
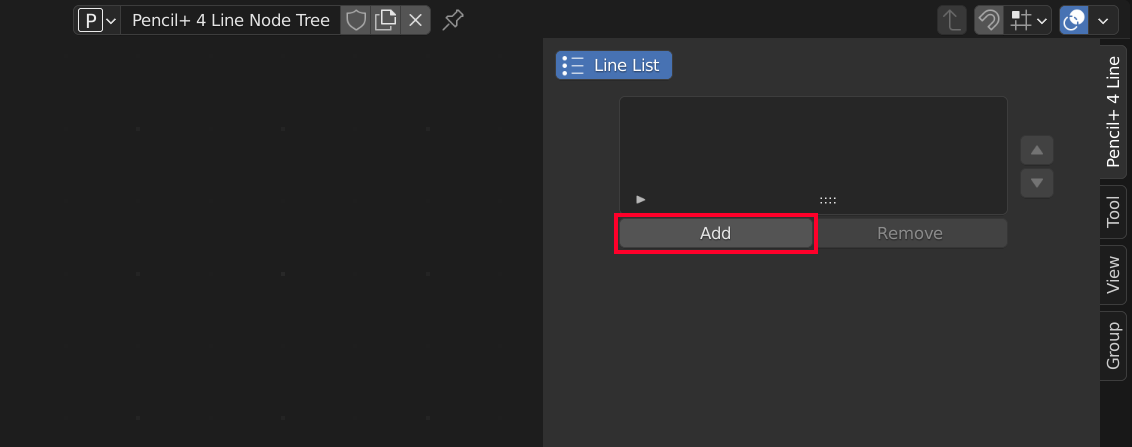
2. The "Pencil+ 4 Line" panel is displayed in the editor. There are no Line settings in the initial state so select [Add] under [Line List].
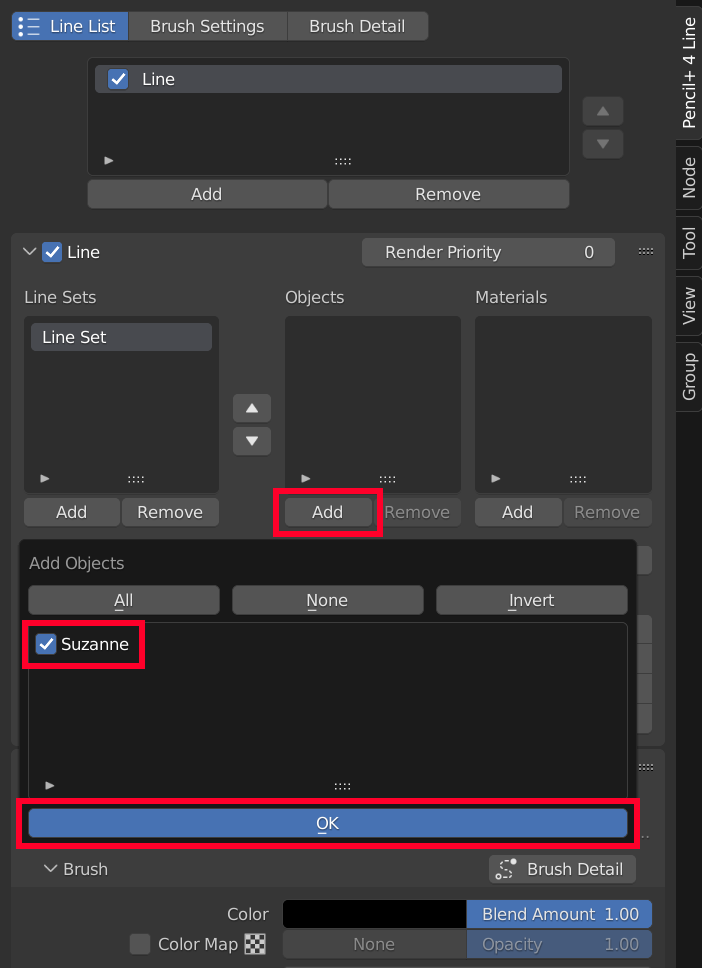
3. Add a [Line Set]. Click [Add] under the [Line Sets] list. A [Line Set] is added.

4. Add objects to the Line Set. Click [Add] under the [Objects] list to display the [Add Objects] dialog. Select the object Suzanne from the list and click [OK].
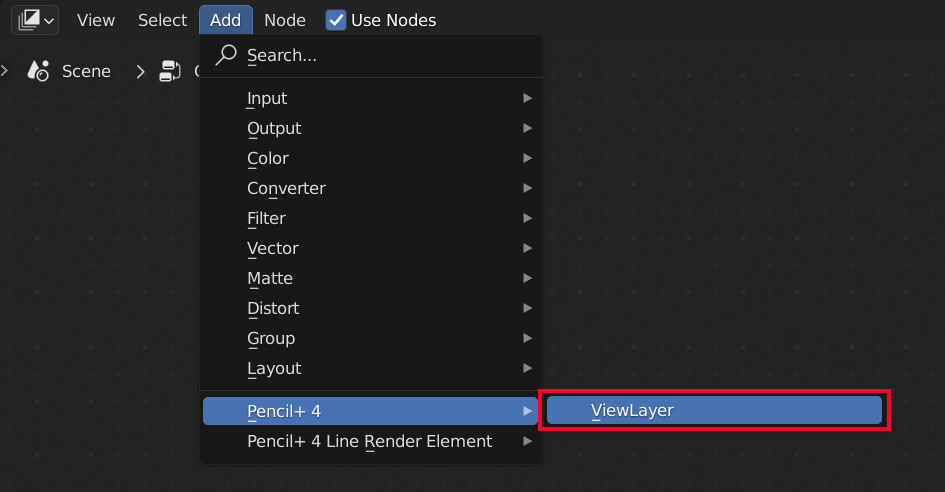
Compositor Settings
A Pencil+ 4 Line ViewLayer is necessary in the compositor to render the Lines.
- Enable the compositor's [Use Nodes].

2. Select [Add] - [Pencil+ 4] - [ViewLayer] from the compositor editor's menu. A Pencil+ 4 Line ViewLayer is created.
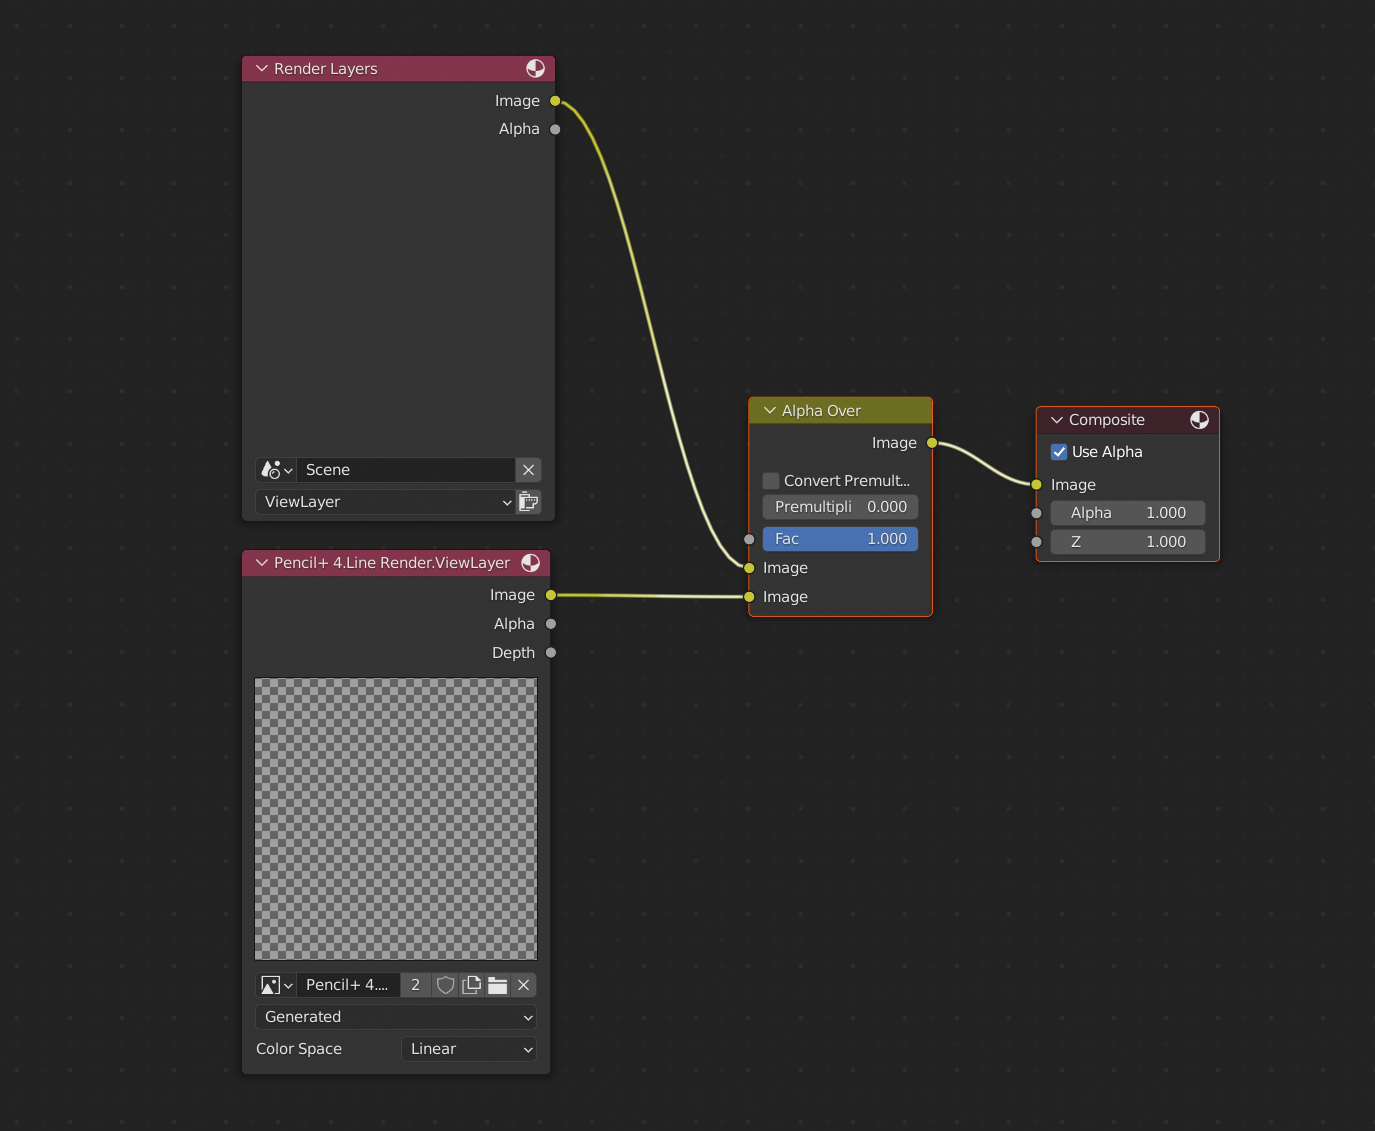
3. Select [Add] - [Color] - [Alpha Over] to add a [Alpha Over] node. Connect the [Render Layers]'s [Image] socket to the top [Image] socket on the [Alpha Over] node. Then connect the [Alpha Over] node's [Image] socket to the [Composite]'s [Image] socket. Finally, connect the Pencil+ 4 Line [ViewLayer] node's [Image] socket to the bottom [Image] socket on the [Alpha Over] node.
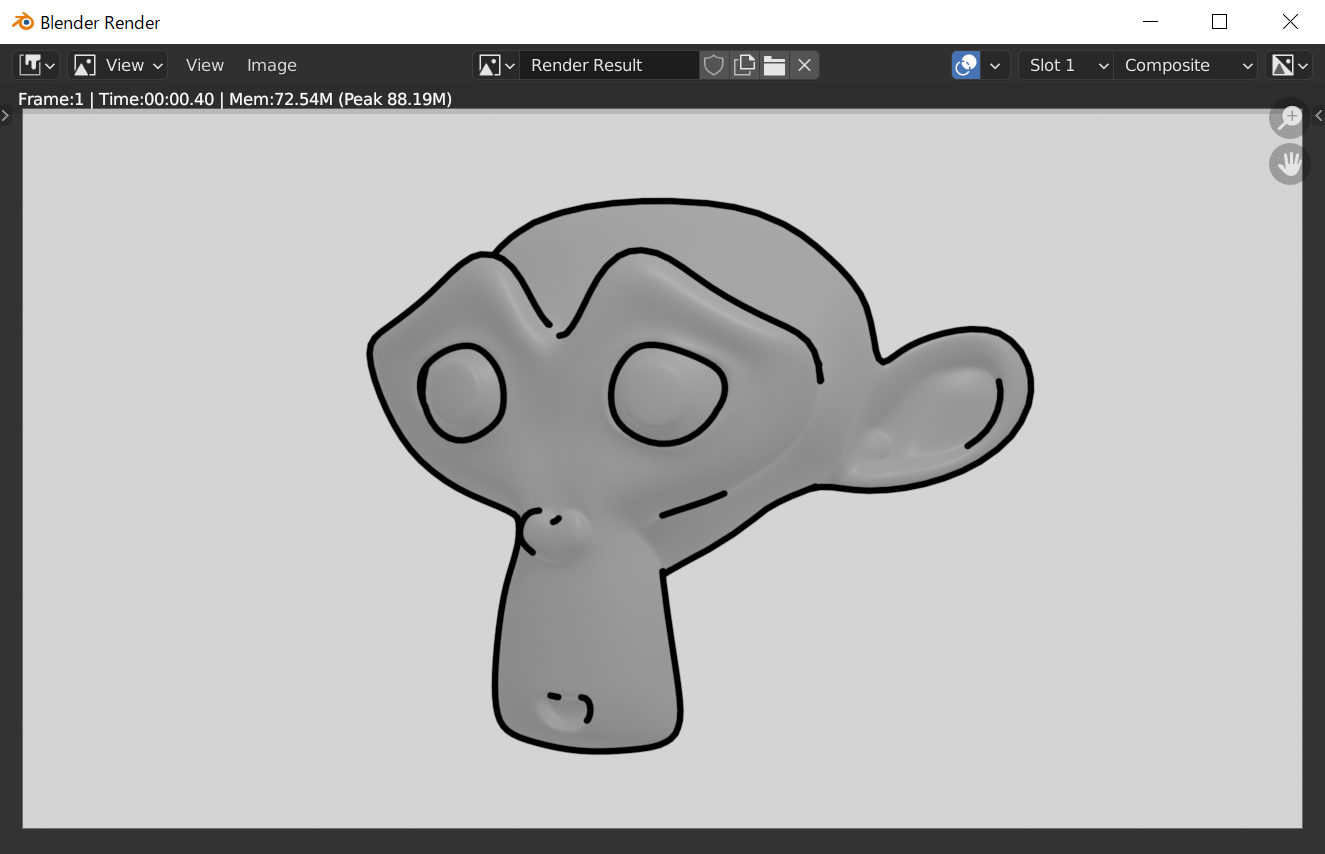
Render
Click [Render Image] from [Render] in the Blender menu. Pencil+ 4 Lines are rendered in the Blender Render window. Freely adjust the Line color and thickness using the Brush area in the Line Set hierarchy. Here we set the size to 6px.