Material
We explain how to use Pencil+ 4 Material to render with toon shading materials.
Create an object
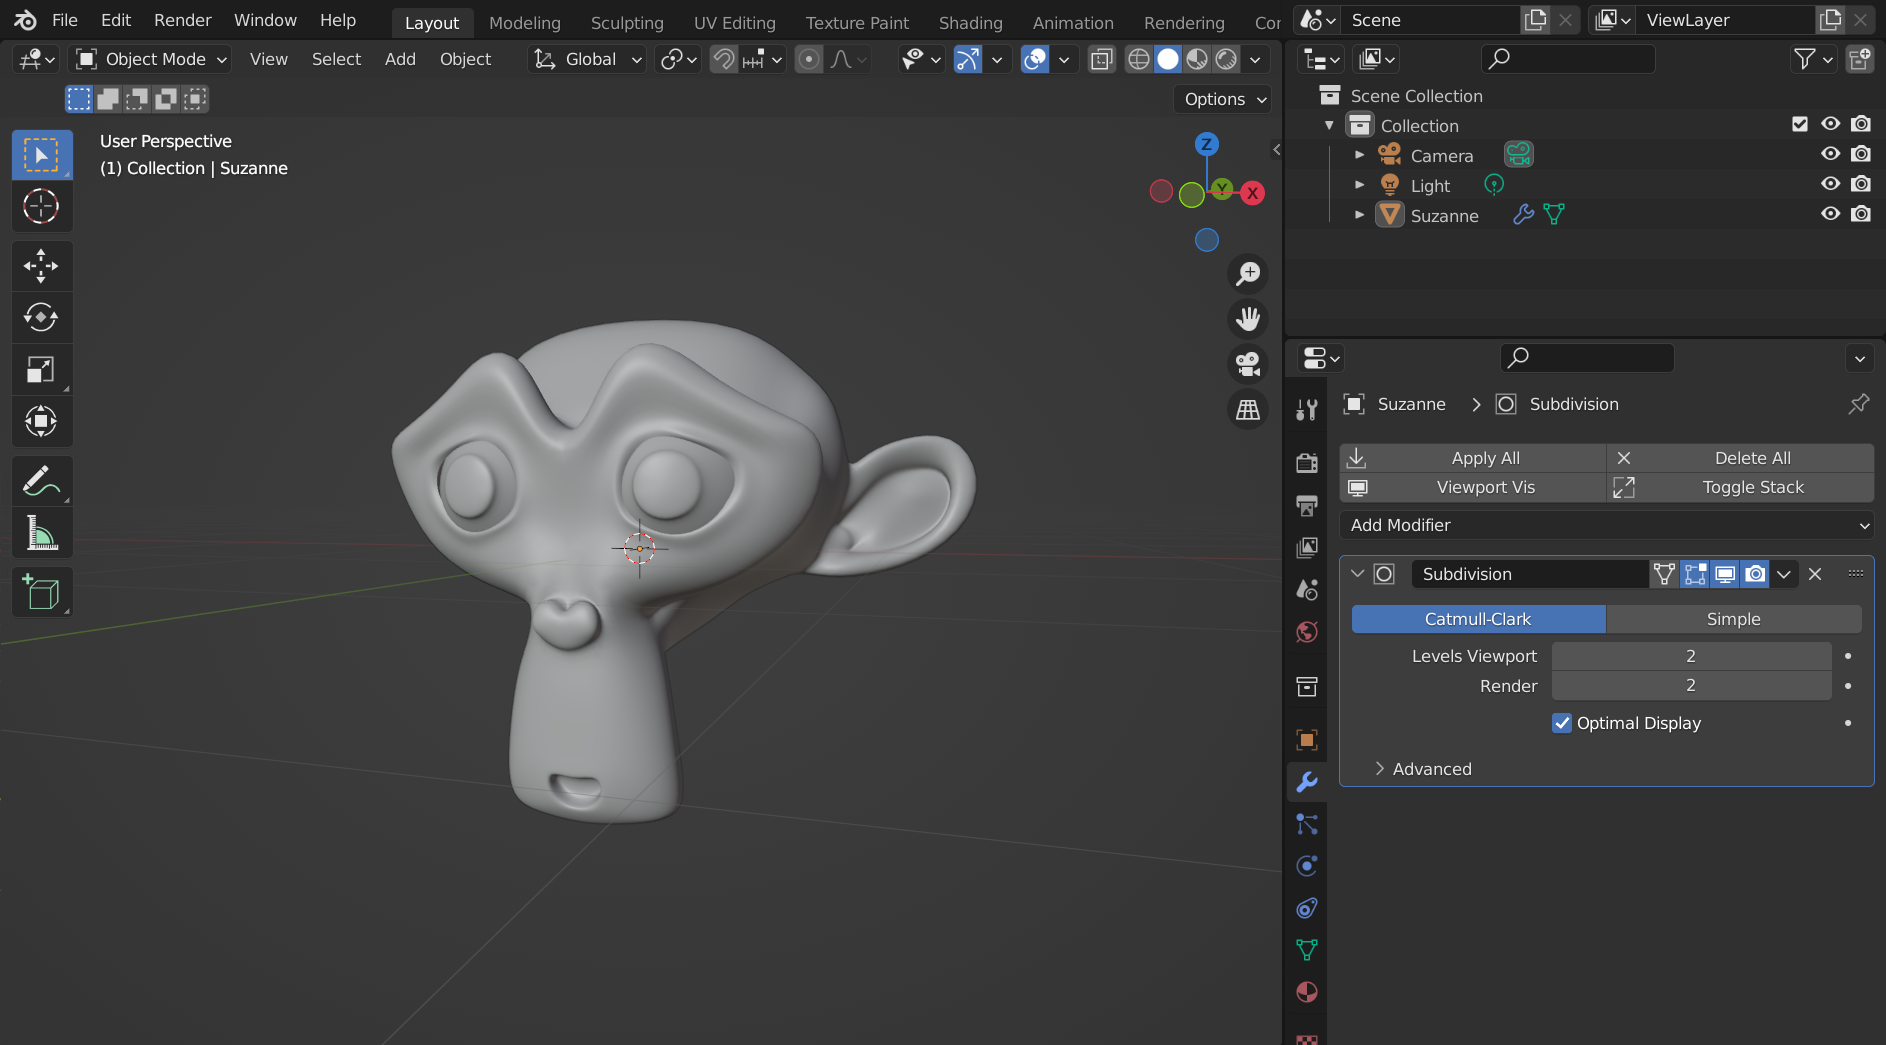
Create an object to be shaded. In this example, we create Monkey from Mesh. To make the surface of the object smooth, we add [Subdivision Surface] from [Modifier Properties] to the object and set [Shade Smooth].
Add a new material
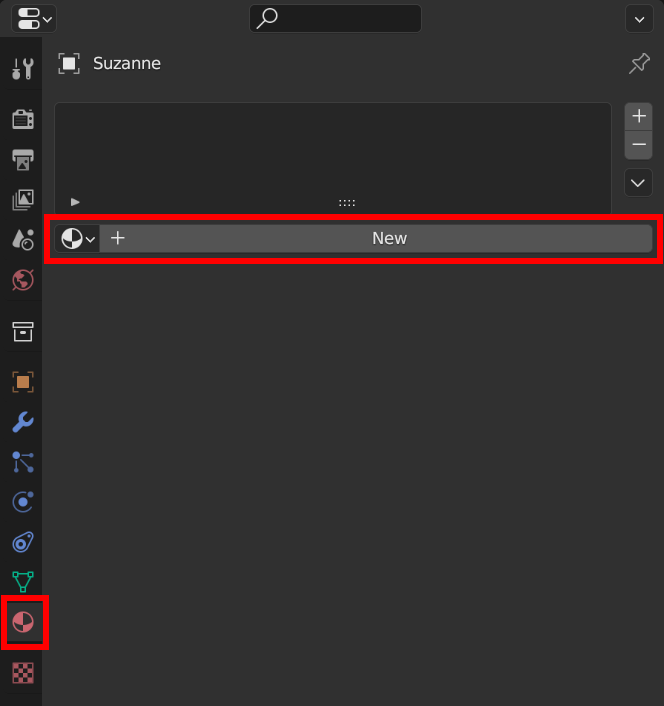
1. To set [Pencil+ 4 Material], you need to add a new material to the object. Select the object and click [New] from [Material Properties] to add a new material.
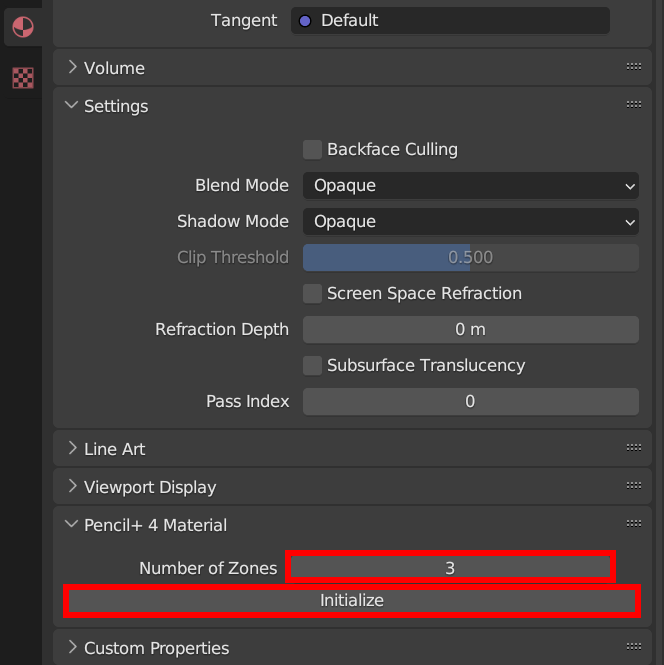
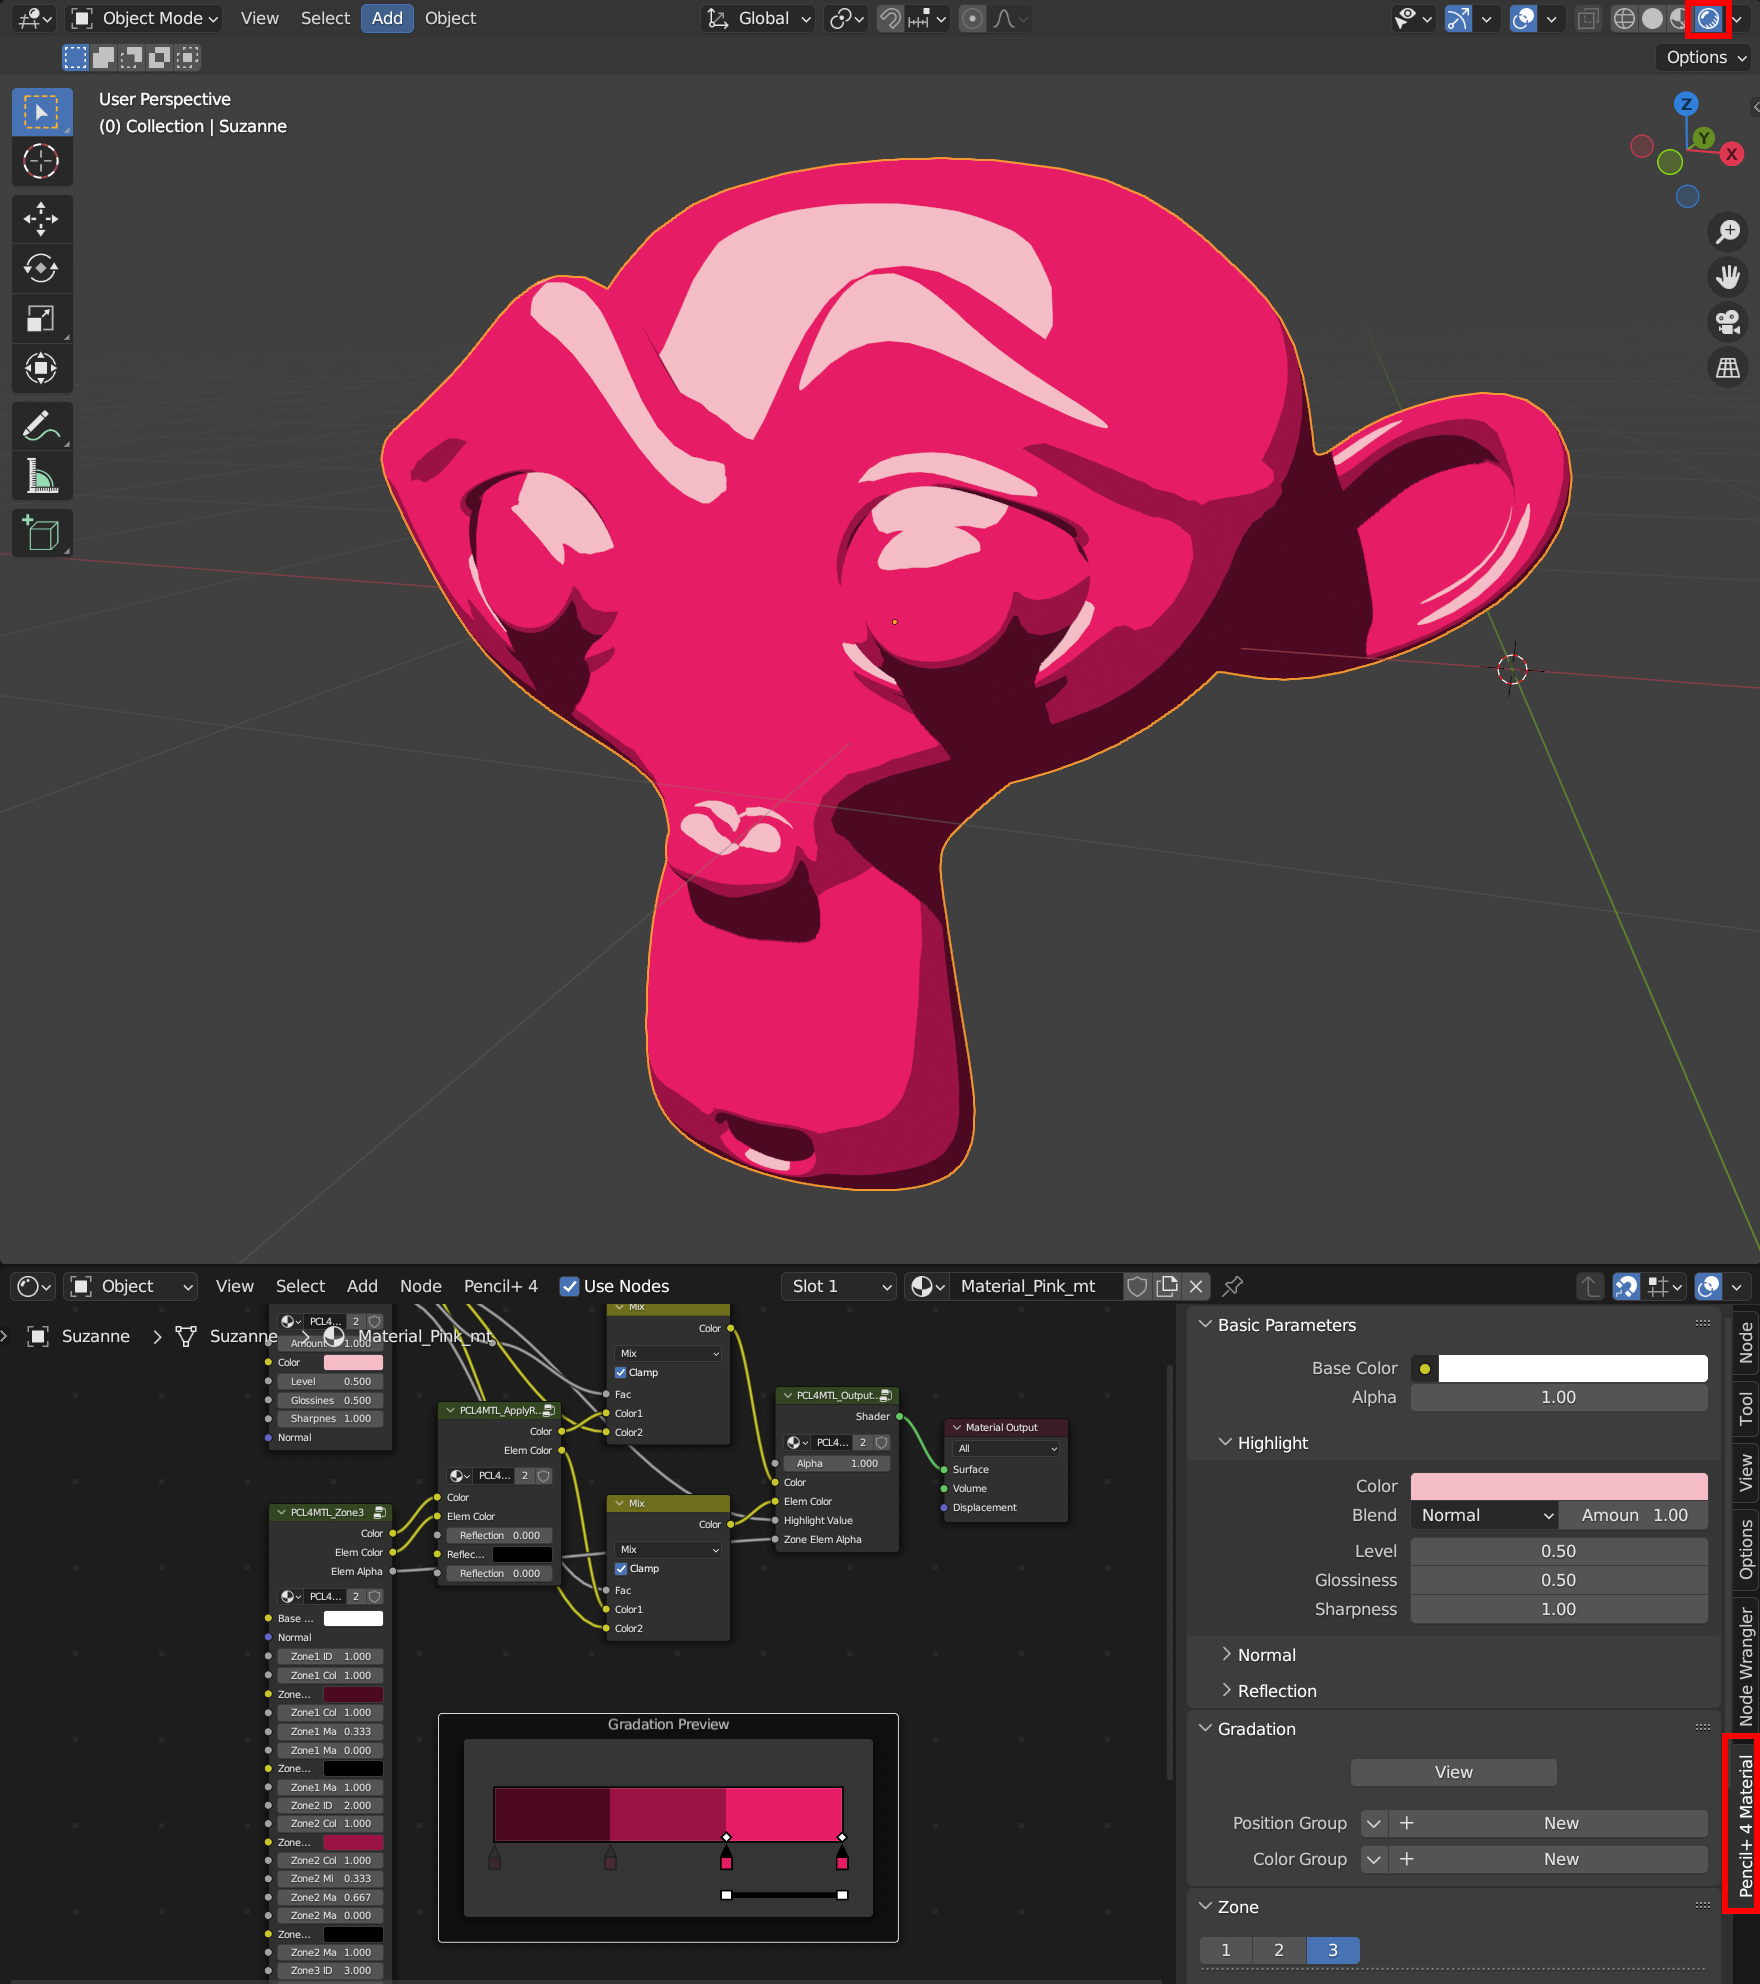
2. Set the Number of Zones from the [Pencil+ 4 Material] panel at the bottom of Material Properties and click [Initialize]. In this example, we set the Base Color of the new material to red-pink, set the Number of Zones to 3 and [Initialize].
Info
The Base Color of the material is reflected by Pencil+ 4 Material's [Initialize].
By setting the Base Color before clicking [Initialize], you can avoid the trouble of changing the colors after initialization.
You can also take advantage of the Base Color to batch convert scenes created with existing materials.
For details, see [Reference] - [Pencil+ 4 Material Menu] - [Batch Convert].
3. The material has been converted to Pencil+ 4 Material. You can see the toon shading results by setting the 3D View Shading to Render Preview. You can also see the sidebar where the Pencil+ 4 Material nodes and settings are set from the Shader Editor.
Info
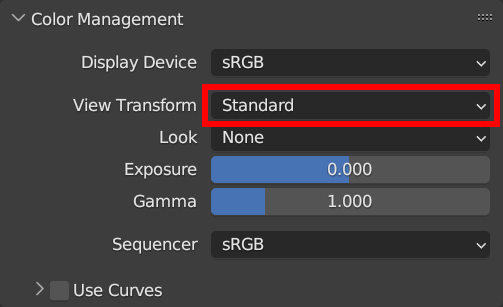
If the colors set in Pencil+ 4 Material are different from the ones displayed in the viewport, set [Render Properties] - [Color Management] - [View Transform] to [Standard].