Applying Effects
We explain how to apply Pencil+ 4 Line effects.
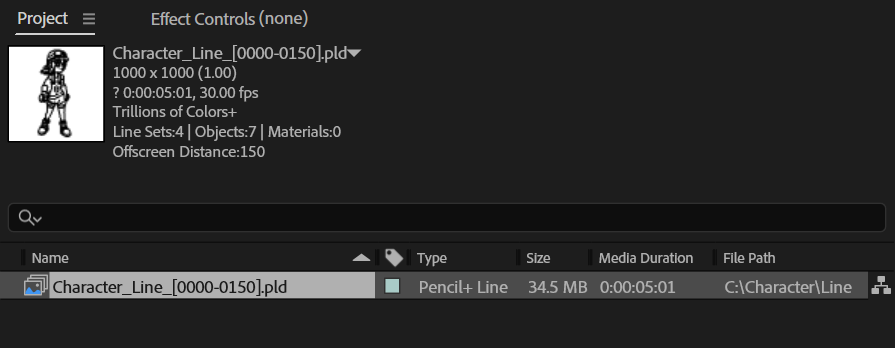
1. Import the PLD file into your project.
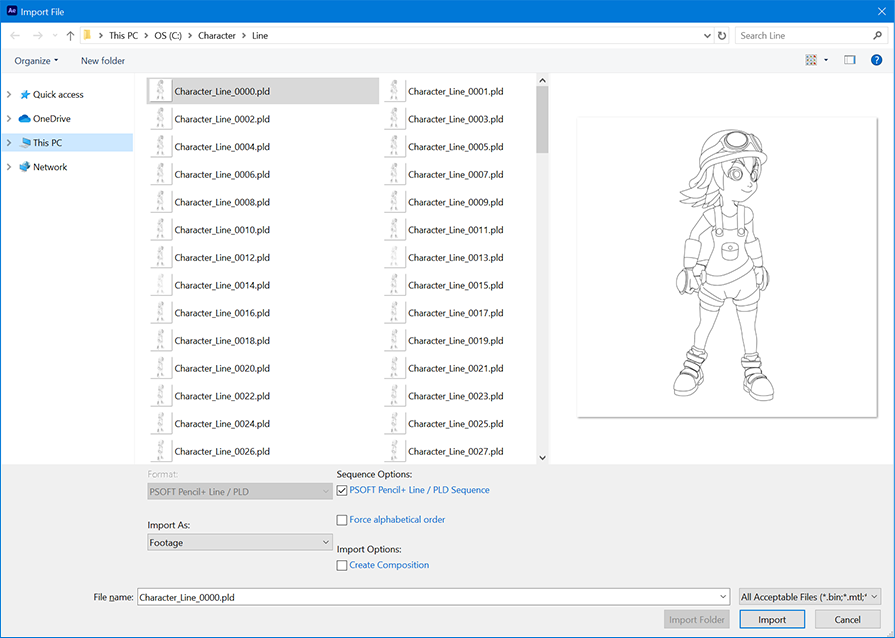
PLD files can be imported into a project in the same way as other image formats. Double-click an empty space in the project list to open the [Import File] dialog. Select a PLD file with the dialog and click the [Import] button.
To import a PLD file as a sequence, check [PSOFT Pencil+ 4 Line / PLD Sequence]. To import a PLD file as a still image, uncheck [PSOFT Pencil+ 4 Line / PLD Sequence].
Info
PLD files can be displayed as thumbnails in Windows Explorer by installing the Pencil+ 4 Line Thumbnail Extension.
2. Place the PLD layer in the composition.
When a PLD layer is placed in a composition, Lines are drawn in the same state as they were rendered in the 3D software. The background color of the Lines is fixed to white.

3. Select the layer to which you want to apply the effect, and click "Effect" in the After Effects main menu.
The Pencil+ 4 Line effect can be used by applying it to PLD layers or solid colors. Here, we select a PLD layer and apply the effect to it.
When the Pencil+ 4 Line effect is applied to a PLD layer, the Lines in the PLD layer stop being drawn.

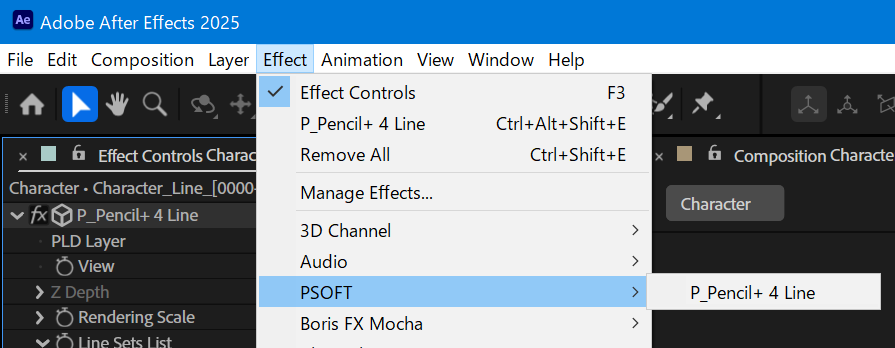
4. Select "P_Pencil+ 4 Line" from the "PSOFT" menu in the Effect menu list.
5. Select the PLD Layer.
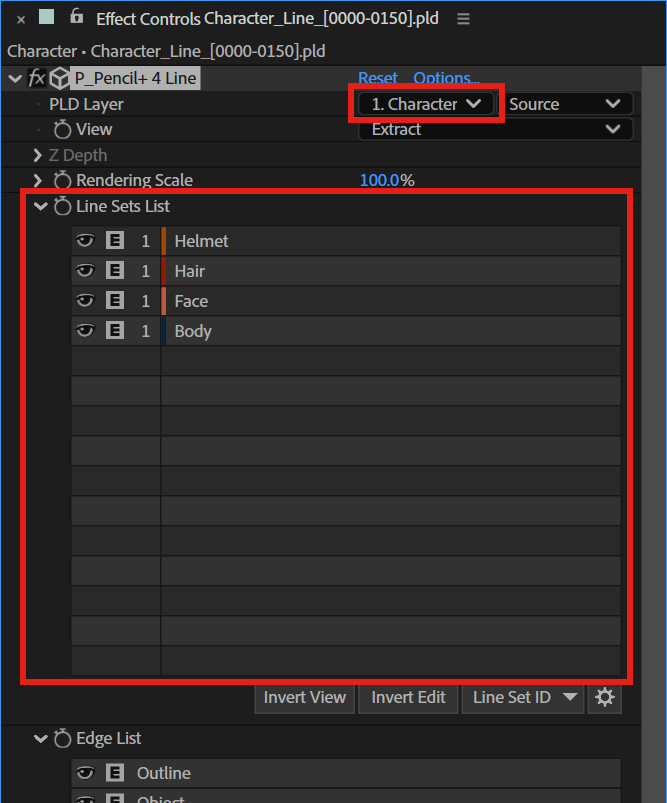
Click the effect's PLD Layer list button and select the PLD layer in the composition. When the PLD layer is set, the Line Sets List is updated, and the Line Sets included in the PLD file are displayed. Parts other than the Lines become transparent and the layer where the effect is applied becomes easy to composite.
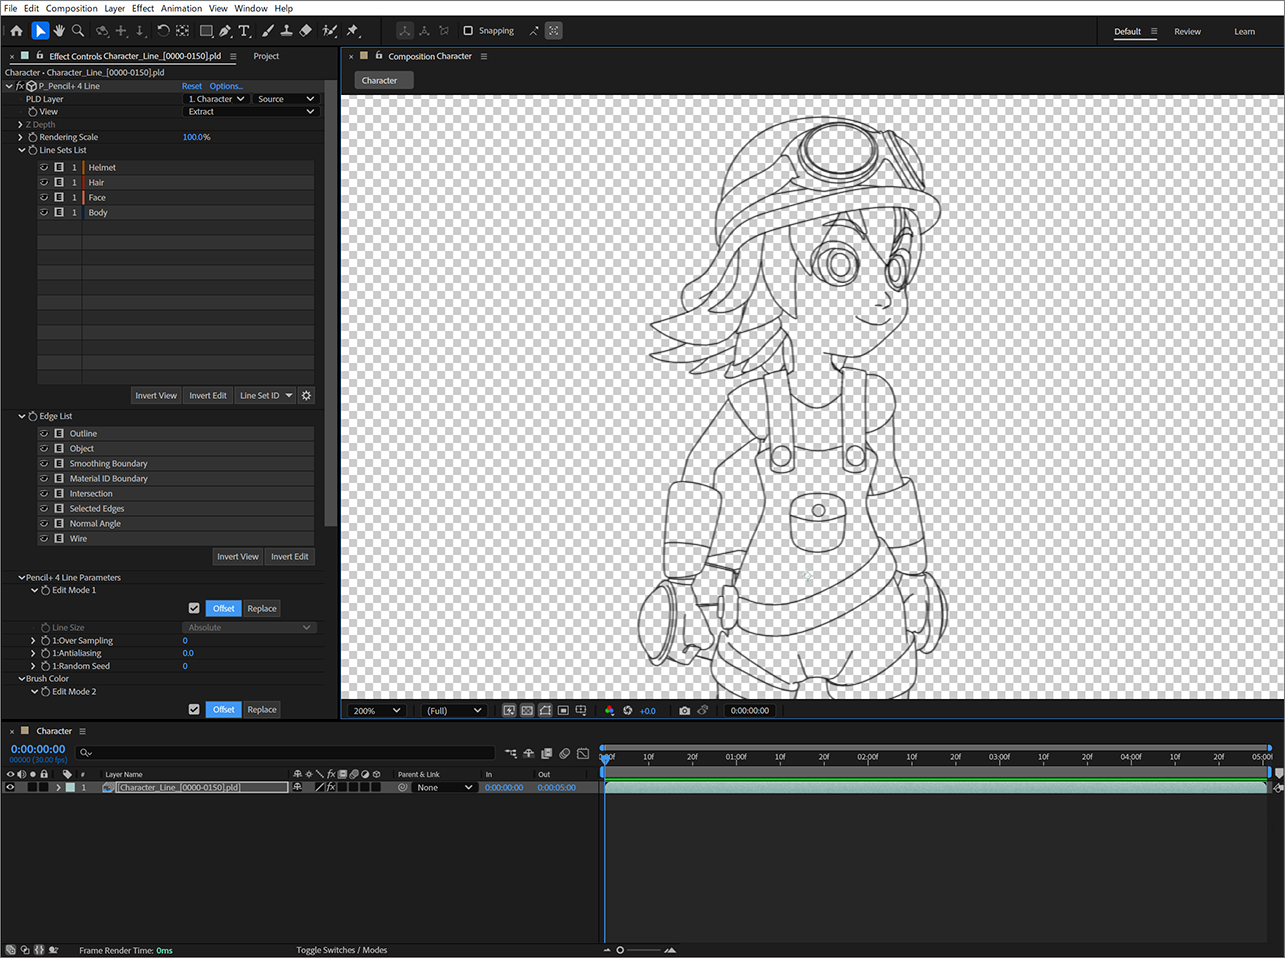
6. The effect is applied.
Adjust the parameters and experiment with editing the Lines.